Support
Cart is empty
Cart totals
Subtotal:
$0.00
Total:
$0.00
Popular Search

Overview

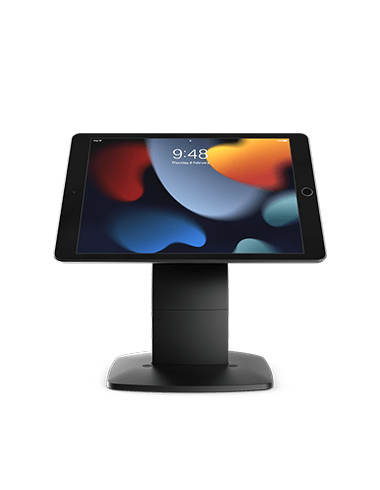
The Touch tablet stand has been carefully designed to securely display your tablet without any case, clamps or cables needed. Display your tablet as it is was designed. slim, sleek and unobstructed.
Download fact sheet
Supports All Tablets
Might update your iPad or android tablet in the future? The Touch tablet holder supports all devices and is secured by 4 strong 3M Command Strip adhesives included with the stand.
Recommended Counter Height
29.53” - 43.31” (75 - 110 cm)

Measuring
Measuring
Height: 8.03” (204 mm)
Width: 4.25” (108 mm)
Weight
Weight
3.31 Ibs (1.50 kg)
Materials
Materials
Die-cast aluminum with powder coating

Setup Guide

Screw Mount (From Above)
Screw Mount (Below)
Freestanding
Optional Extras
01 Drill pilot holes
Lift base casing from the base plate & drill pilot holes to assist with screw base mounting. Refer to the mounting guide for assistance.
02 Drill larger hole if running cable through surface
If you are running your charging cable through the surface, ensure to drill a larger hole to feed cable through.
03 Screw down stand to base plate
Screw down your stand through the base plate using the wood screws provided & press down the base casing over the base plate.
04 Peel off adhesive paper
Peel off the paper from the 3M Command strip.
05 Stick bracket to center of tablet
Place the bracket in the center of the tablet and press down and hold for 20 seconds.
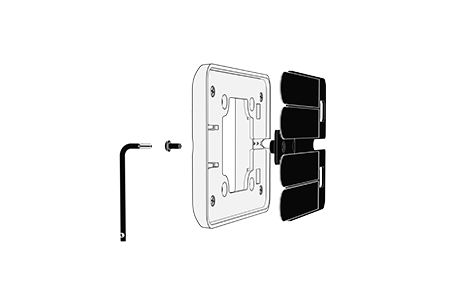
06 Screw top bracket
Re-attach top bracket and secure with the security screw.
01 Drill pilot holes
Lift base casing from the base plate & drill pilot holes to assist with screw base mounting. Refer to the mounting guide for assistance.
02 Drill larger hole if running cable through surface
If you are running your charging cable through the surface, remove the cable clip and ensure to drill a larger hole to feed cable through.
03 Screw down stand through mounting surface
Screw down your stand through mounting surface using the screws and washers provided.
04 Peel off adhesive paper
Peel off the paper from the 3M Command strip.
05 Stick bracket to center of tablet
Place the bracket in the center of the tablet and press down and hold for 20 seconds.
06 Screw top bracket
Re-attach top bracket and secure with the security screw.
01 Unscrew top bracket
Unscrew top bracket that holds the adhesive and remove. Feed cable through the stand.
02 Peel off adhesive paper
Peel off the paper from the 3M Command strip.
03 Stick bracket to center of tablet
Place the bracket in the center of the tablet and press down and hold for 20 seconds.
04 Screw top bracket
Re-attach top bracket and secure with the security screw.
01 Rotation Lock
Place case on the pole in desired rotation and screw lock screw as shown to lock rotation.
02 Tilt Adjustment Lock
Using Allen key provided, tighten screw at desired angle to lock in position.
Problems during setup?
Share Your Cart