Free shipping on all US orders over $100.

Resources Support
Cart is empty
Cart totals
Subtotal:
$0.00
Tax
$0.00
Total:
$0.00
Popular Search
Page
Support

Overview

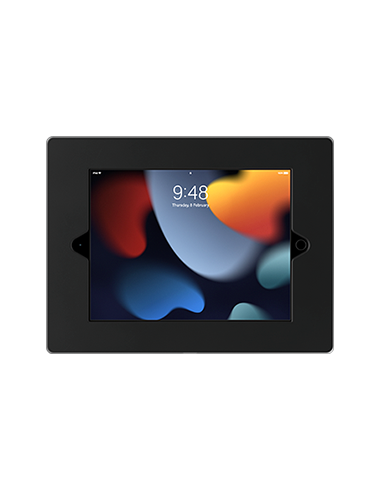
Sleek, streamlined and secure, the Hub offers a simple and convenient option to affix your iPad to a wall. Suited to 10.2-inch iPads, this is the perfect solution for information kiosks, visual displays, visitor check-in, POS or even smart home use.
Download fact sheet
Supported Apple Devices
iPad 10.2" - 7th, 8th & 9th Gen
Recommended Positioning Height
51.2” - 59” (130 - 150 cm)
Measuring
Measuring
Height: 9.06” (230 mm)
Width: 11.97” (304 mm)
Weight
Weight
2.01 Ibs (0.91 kg)
Materials
Materials
Die-cast aluminum with powder coating

Setup Guide

Screw Mount
Screw mount with magnetic lock
VESA Mount
Optional Extras
01 Remove faceplate
Lift the faceplate off the mounting plate.
02 Drill pilot holes
Drill pilot holes to assist and drill a hole for your charging cable to feed through.
03 Screw mounting plate to wall
Screw the mounting plate to your surface.
04 Feed charging cable through hole
Feed the charging cable through the pre-drilled hole prior to inserting the iPad.
05 Plug in charging cable & slot in iPad
Plug in charging cable and place iPad in the mounting plate at the base first and then push into position.
06 Place faceplate on mounting plate
Place the faceplate on the mounting plate until secured by the magnets. To remove, simply lift the faceplate from the magnetised mounting plate.
01 Remove faceplate
Lift the faceplate off the mounting plate.
02 Drill pilot holes
Drill pilot holes to assist and drill a hole for your charging cable to feed through.
03 Screw mounting plate to wall
Screw the mounting plate to your surface.
04 Feed charging cable through hole
Feed the charging cable through the pre-drilled hole prior to inserting the iPad.
05 Plug in charging cable & slot in iPad
Plug in charging cable and place iPad in the mounting plate at the base first and then push into position.
06 Attach faceplate to mounting plate hook
Attach the faceplate to the hook at the top of the mounting plate and then press the bottom until the lock clicks into position.
To unlock, hold the magnetised key under faceplate and slowly remove faceplate from the base.
01 Screw VESA mount to wall
Install VESA mount to mounting surface with screws.
02 Run cable through wall or cable cutout
Run the cable either:
a) Through the wall.
b) Through the optional cable cutout.
03 Screw mounting plate to VESA wall mount
Using the screws provided, screw the mounting plate to the VESA wall mount.
04 Plug in charging cable & slot in iPad
Plug in charging cable and place iPad in the mounting plate at the base first and then push into position.
05 Place faceplate on mounting plate
Place the faceplate on the mounting plate until secured by the magnets. To remove, simply lift the faceplate from the magnetised mounting plate.
01 Magnetic Lock
For additional security, a magnetic lock is available for The Hub. Designed to secure your device against theft, the lock latch is released using a magnetic key.
02 VESA Mount
The VESA Case addon allows you to attach your tablet holder to any VESA compatible mount. It also includes additional space to store excess cables or power banks or PoE adaptors behind the tablet.

Please note: VESA Case add on is the case only and does not include a VESA mount.
Problems during setup?
l
Share Your Cart