Free shipping on all US orders over $100.

Support
Cart is empty
Cart totals
Subtotal:
$0.00
Tax
$0.00
Total:
$0.00
Popular Search
Page
Support

Overview

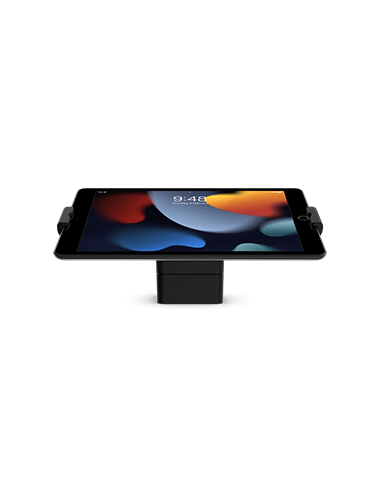
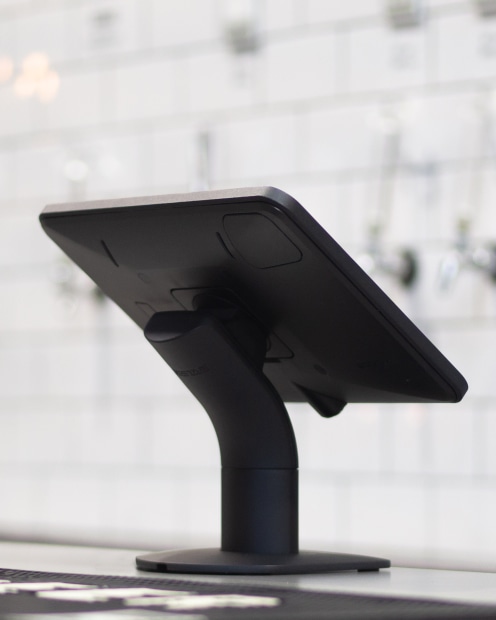
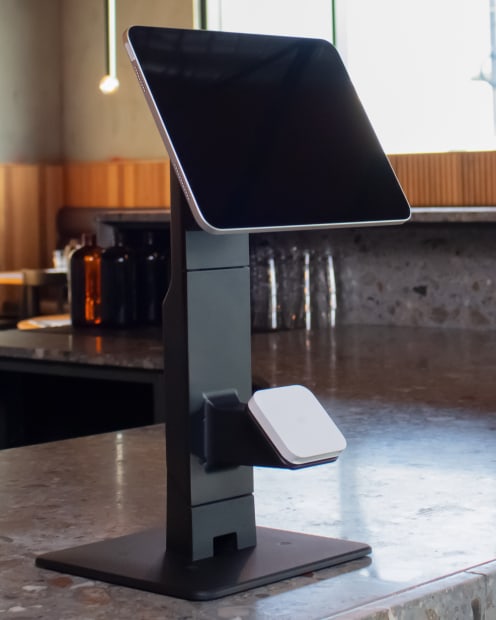
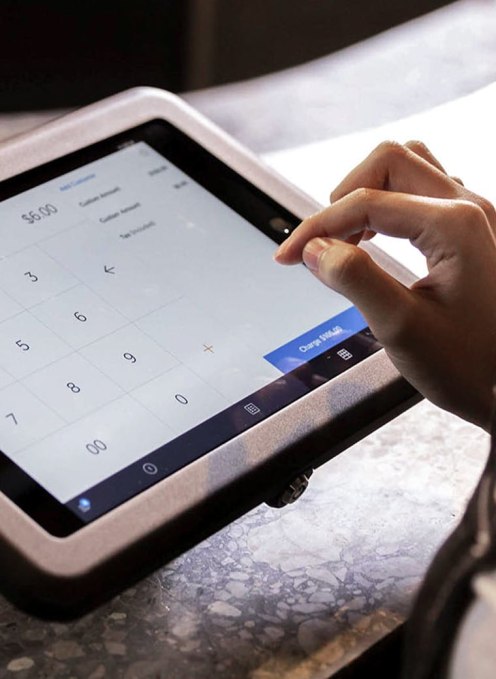
The Edge Nexus stand range features a unique clamp based design that includes a simple security lock release option. Perfect for POS and kiosk self-service applications. Designed for the 10.2” iPad.
Download fact sheet
Supported Apple Devices
iPad 10.2" - 7th, 8th & 9th Gen
Recommended Counter Height
29.53” - 35.43” (75 - 90 cm)
Measuring
Measuring
Height: 4.33” (110 mm)
Width: 10.35” (263 mm)
Weight
Weight
2.87 Ibs (1.30 kg)
Materials
Materials
Die-cast aluminum with powder coating

Setup Guide

Screw Mount
Freestanding & Adhesive Mount
Optional Extras
01 Remove case from stand
Unscrew screws and lift the Edge case off the stand.
02 Line up screw base holes
Follow the above locations to line up your surface mounting and cable feed.
03 Refer to mounting guide if drilling
Refer to the mounting guide for assistance in drilling pilot holes and a hole for your charging cable if required.
04 Screw down stand
With the cable channel facing out the left hand side, screw down using the wood screws provided. Ensure you feed cable through before mounting.
05 Reattach case to stand
Remove the cable clip and place case back on the stand and screw back in the 4 screws.
06 Unlock security lock
Unlock the security lock with the L shape key and slide the clamp out.
07 Squeeze tablet into clamp
Squeeze the tablet into the clamp with the charging cable running behind the tablet.
08 Re-attach clamp arm
Re-attach the clamp arm by sliding in and squeezing tablet.
09 Lock the security lock
Remain holding clamp together until you have rotated the security lock with the L shape key into the lock position.
01 Remove cable clip
Remove the cable clip and feed charging cable through the stand.
02 Slide clamp out
Unlock the security lock and slide the clamp out.
03 Re-attach clamp arm
Re-attach the clamp arm by sliding in and squeezing the tablet.
04 Lock the security lock
Remain holding clamp together until you have rotated the security lock in the lock position.
05 Wipe mounting surface
Wipe base of stand and your mounting surface with alcohol wipes provided and let dry.
06 Stick adhesive to base
Stick 3M adhesive to the base of stand and firmly place down on your mounting surface. Let the stand sit for 24 hours before use.
01 Position Lock
Rotate stand 45 degrees so cable hole is on the left, then screw in lock screw as shown. This will lock the rotation for a fixed option.
Problems during setup?

Related articles

Share Your Cart