Anonymous
![Verified Customer]() Verified Customer
Verified Customer
![4 Stars]()
The website is organized weird. The information should be listed before the buy options. It makes me think there is no more information below.
Anonymous
![Verified Customer]() Verified Customer
Verified Customer
![5 Stars]()
Good product, looks very proffessional. Only if you had an ipad mini option
Anonymous
![Verified Customer]() Verified Customer
Verified Customer
![5 Stars]()
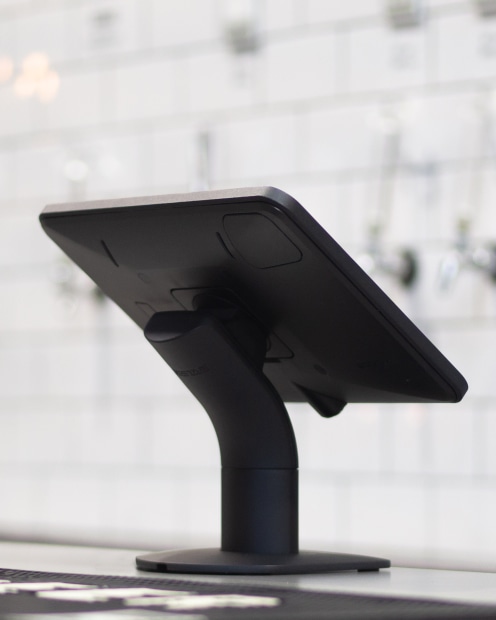
Fantastic product. Absolutely love it. Build quality is fantastic and looks so professional and stylish in front if customers.
Destiny Griffin
![Verified Customer]() Verified Customer
Verified Customer
![5 Stars]()
The BossTab team was beyond helpful in assiting finding the best iPad enclosure for our needs. Spoiler alert- WE FOUND AN AWESOME SOLUTION! Thank you BossTab!!
Shaun Carter
![Verified Customer]() Verified Customer
Verified Customer
![5 Stars]()
This is a really sleek product and super easy to install.
Mark Douthie
![Verified Customer]() Verified Customer
Verified Customer
![5 Stars]()
Excellent, Very helpful and propmpt service. Product is excellent.
Paula Boult
![Verified Customer]() Verified Customer
Verified Customer
![5 Stars]()
Every person we interacted with had a smile on their face whilst they talked about their products. Great customer experience and yes ! the product is exactly what we wanted.
Anonymous
![Verified Customer]() Verified Customer
Verified Customer
![5 Stars]()
Its beautiful!
Alessandro Panebianco
![Verified Customer]() Verified Customer
Verified Customer
![5 Stars]()
great device, perfect.
Tanya Millar
![Verified Customer]() Verified Customer
Verified Customer
![5 Stars]()
Were happy to answer any questions prior to purchase, enabling us to get the right quality product to suit our needs. Highly recommended.
Jayne McWilliam
![Verified Customer]() Verified Customer
Verified Customer
![5 Stars]()
We think our product is just amazing thank you
Robert Bishp
![Verified Customer]() Verified Customer
Verified Customer
![4 Stars]()
Initially, I ran into an issue where a standard USB cord wouldn’t fit when plugging into the Samsung Galaxy A9+ while mounted — something that would have been helpful to know upfront, perhaps with a recommendation for a right-angled cable. However, after contacting customer service, they quickly addressed my concern and provided a solution. I’ve used this company’s products in the past without issues, and I continue to appreciate their solid construction and functionality. I’m pleased with how they handled the situation and will continue to be a customer
Bruce McIver
![Verified Customer]() Verified Customer
Verified Customer
![5 Stars]()
Great to deal with, high Quality product, fast shipment. Highly recommended
Kelly McCaskie
![Verified Customer]() Verified Customer
Verified Customer
![5 Stars]()
Fast delivery, quality product.
Liam Bentley
![Verified Customer]() Verified Customer
Verified Customer
![5 Stars]()
Great Product
Anonymous
![Verified Customer]() Verified Customer
Verified Customer
![5 Stars]()
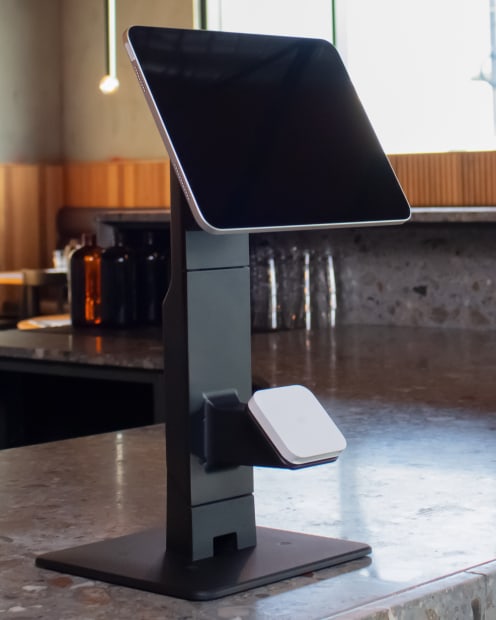
Professional company with great products and website. Perfect fit for our shop counters with new iPads.
Jorge Farinha
![Verified Customer]() Verified Customer
Verified Customer
![5 Stars]()
Excelentes soluções.
Rápidos envios.
O parceiro ideal de negócio.
Neetasha Dobson
![Verified Customer]() Verified Customer
Verified Customer
![5 Stars]()
Communication was great and it arrived as mentioned. we havent set it up yet but Its sturdy which we think is going to last forever
Dean Wise
![Verified Customer]() Verified Customer
Verified Customer
![5 Stars]()
Love it. Sleek and stylish!
Liam Jarrett
![Verified Customer]() Verified Customer
Verified Customer
![5 Stars]()
Postage time was outstanding, very very quick. 1 day from Melbourne to FNQ? Good design of the case, however, when the case gets locked, it pushes on the volume buttons and pushed it to max volume over and over.