Support


iPad Kiosk Mode
How To Lock an iPad Screen
If you’re looking to use your iPad as a kiosk and lock down the screen to a single app, here’s how it’s done using the inbuilt iPad kiosk mode Guided Access feature.


Enable Guided Access
Follow these steps to turn on Guided Access for iPad kiosk mode.

Step 1
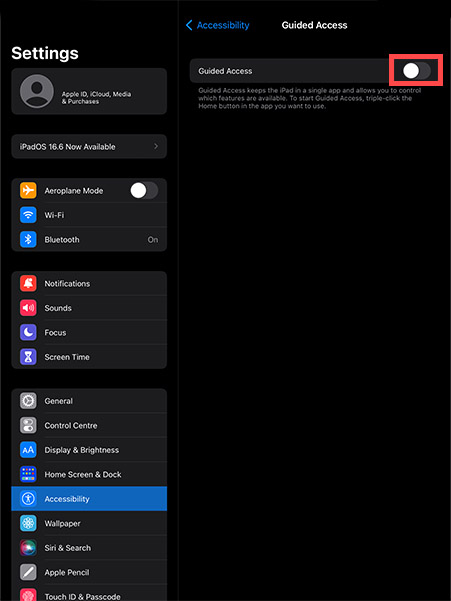
Open Settings and select "Accessibility" in the list on the left-hand side of the screen.
Step 2
In Accessibility, scroll right down to the bottom of the featured list until you find "Guided Access" near the bottom (In the General Section).
Step 3
Toggle the Guided Access switch to “on” and tap on "Passcode Settings".

Step 4
Click on "Set Guided Access Passcode" (this password allows you to enter and exit iPad kiosk mode).

Step 5
Enter a passcode (you will need to enter it a second time to confirm the code).

Step 6
You can also opt to use "Touch ID" to end Guided Access.
Configure Guided Access
Follow these steps to configure Guided Access for iPad.
Step 1
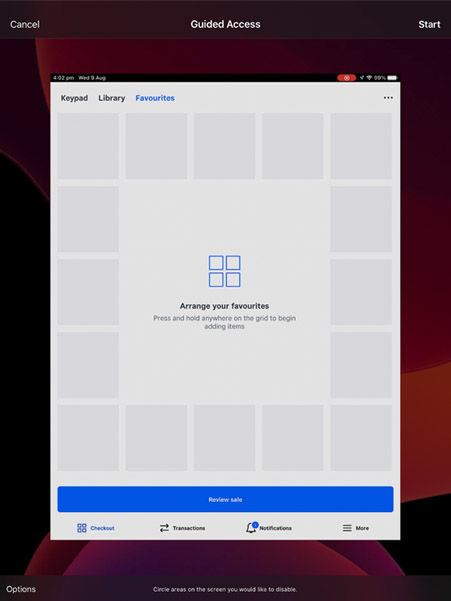
Open your desired app, we're using Square POS. With your app open, triple click on the Home button. The triple click launches, disables and allows you to configure Guided Access when you require. If you’re using the iPad Pro, triple click the power button.

Step 2
At this stage you are given the option to circle areas on the screen that you want to disable. These areas will then no longer respond to touch. You can circle multiple areas, should you wish.

Step 3
You can also click “Options” in the bottom left corner. This will bring up a menu of features you can turn on, off and configure, including disabling the whole screen.

Step 4
Once you have set Guided Access up as you wish, click “Start” in the top right corner. This commences the Guided Access (kiosk) session.
Exit Guided Access
Follow these steps to end Guided Access for iPad.

Step 1
You can exit Guided Access at any time by triple-clicking the Home button (or the Power button) and enter the Guided Access password. If you selected Touch ID, you can authorise exit using these methods.

Step 2
Now simply press "End" at the top left corner of the screen to exit Guided Access. Click here to find out more about iPad.
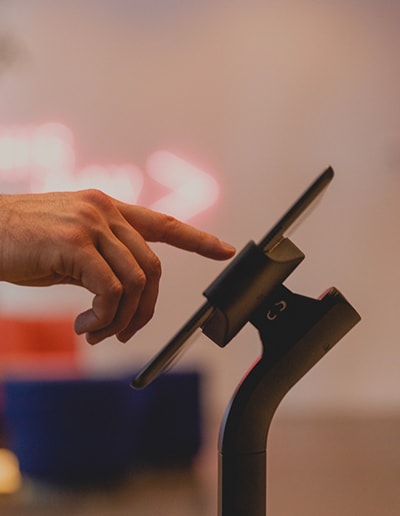
Keep your users on track with iPad Kiosk Mode
Looking to elevate your business tech game? Here’s a secret weapon: iPad Kiosk Mode with Guided Access. This is particularly a lifesaver for those in Point of Sale (POS) or Visitor Management sectors. Guided Access is like the ultimate bouncer for your iPad—it ensures users stick to what they’re supposed to do.
Want to prevent them from exiting an app? Check. Need to keep those power and volume buttons off-limits? Done. Essentially, it locks down features that might sidetrack or disrupt the user experience. With iPad Kiosk Mode, you maintain full control, ensuring transactions are seamless and visitor interactions remain professional. So, if you’re keen on providing a focused, distraction-free experience, this combo is your go-to solution.